

as promised, i'm back with a quick tutorial on how to make the lindsey adelman chandelier.
i thought that her instructions were easy to follow and mostly clear, so start there if you want step-by-step instructions. we had a few issues, which i will explain below. i feel like i should note that prior to this project, mike and i had done some electrical work in our house (both installing new fixtures and running all new wiring), so we were already comfortable with basic wiring skills. we had also made a light fixture for our dining room, which made me a little more confident going in to this project.

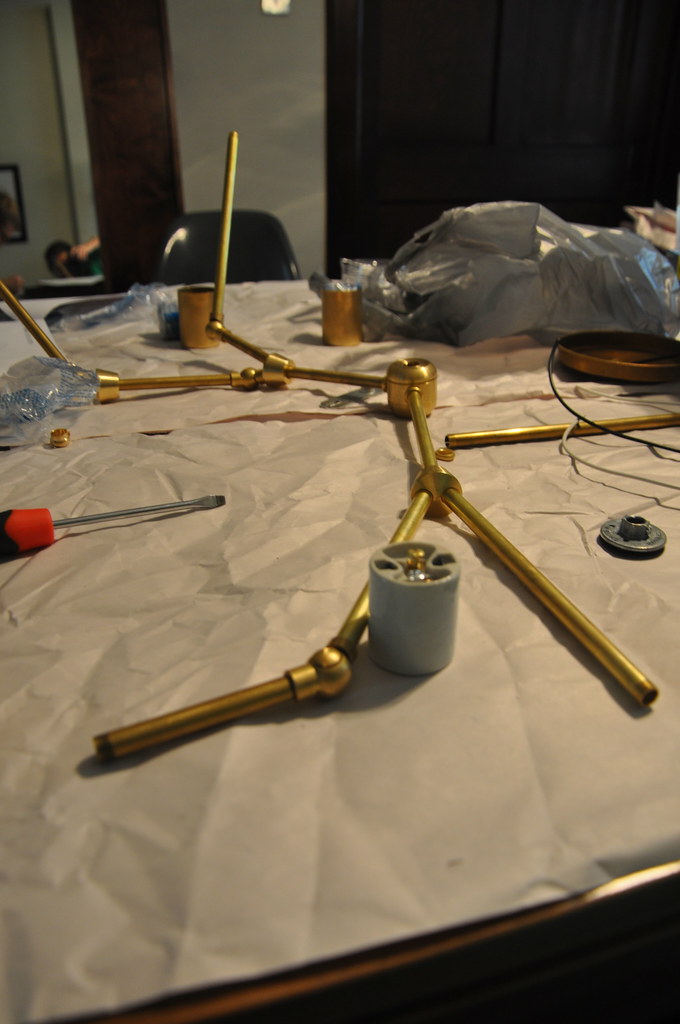
the first thing i did was review the instructions, including the materials list. we wanted to hardwire the fixture (her instructions are for a plug-in fixture), so we needed to order a few different parts. i also wanted to use 5 bulbs instead of 6. we ordered everything from grandbrass, except for the wires which we bought from lowes. unpacking the box and seeing all of these pieces was a little concerning... hard to believe that this was going to make a light!

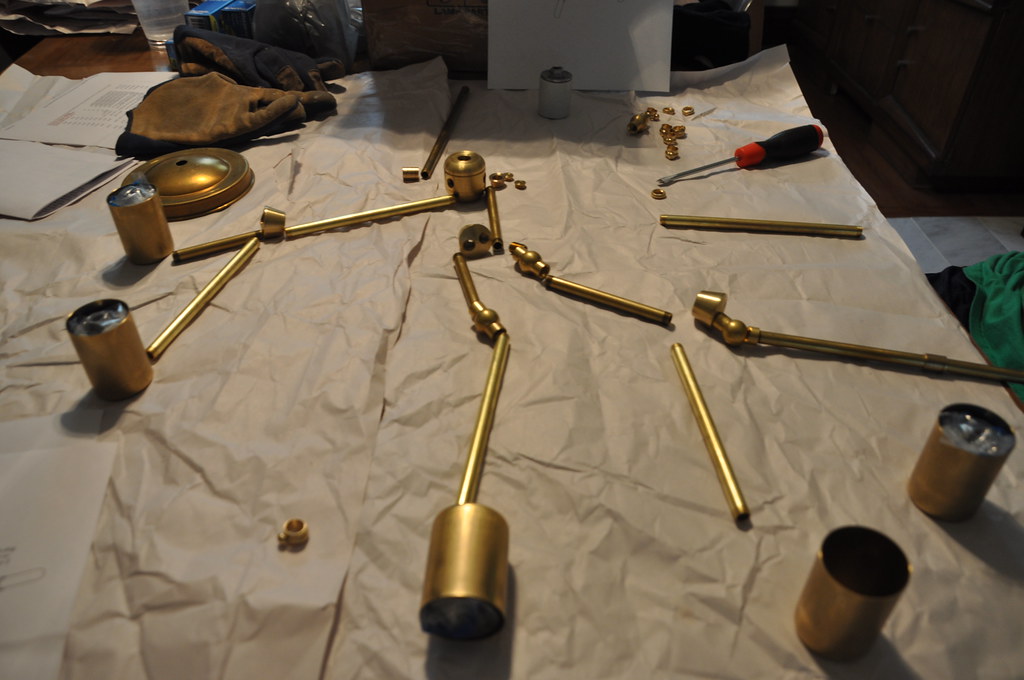
next we did a quick layout of the pieces. her instructions include a nice diagram, but didn't specify lengths for each individual brass tube, so we came up with something that we thought would work for us.
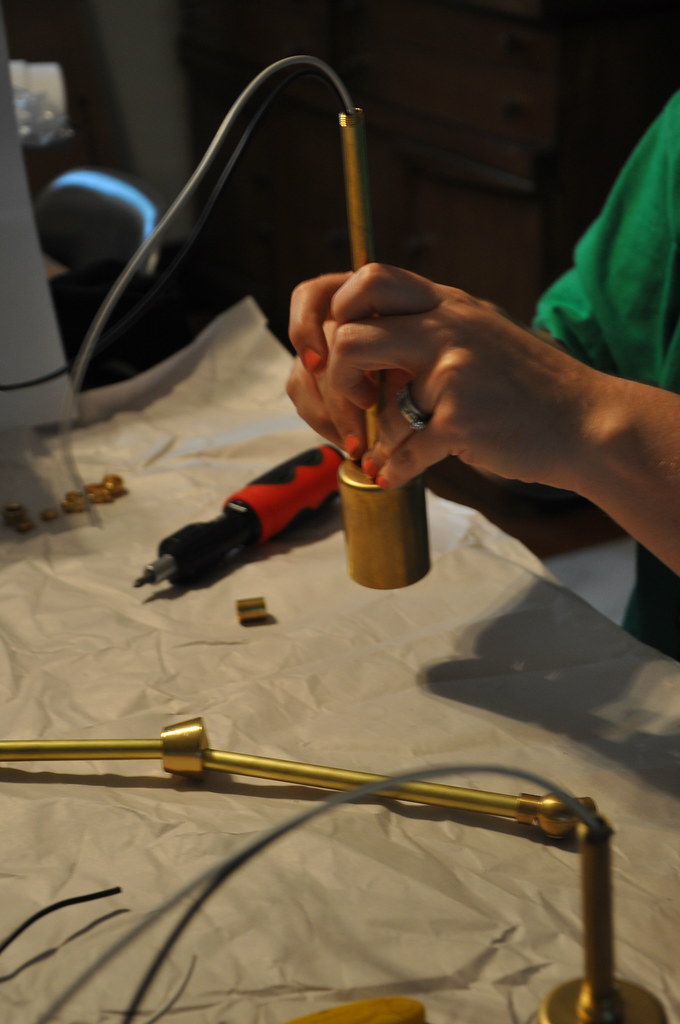
then, we started wiring! we found that it was easiest to start at the socket and work our way in towards the center of the fixture. each arm has its own set of wires. we cut a good length of wire to make sure we had enough.

once you got the process down, it was actually kind of fun to build.
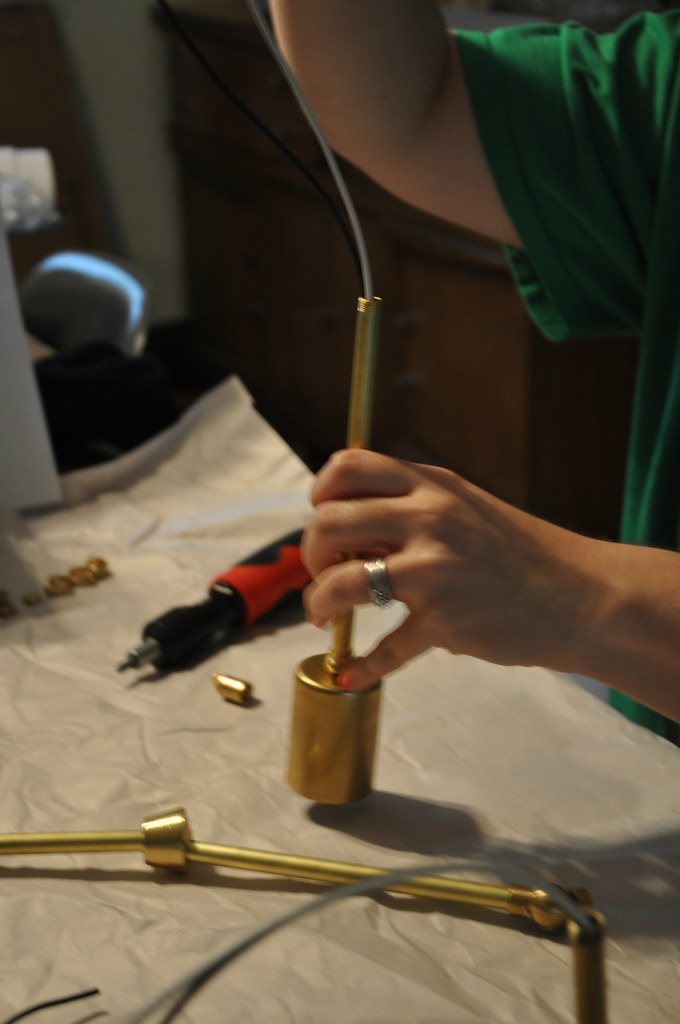
at some point, we realized that the gauge of wire that we bought was too thick, it wouldn't fit through the tubes and fittings once we had several wires that needed to run together. so we had to take it all apart and start over with new wires.
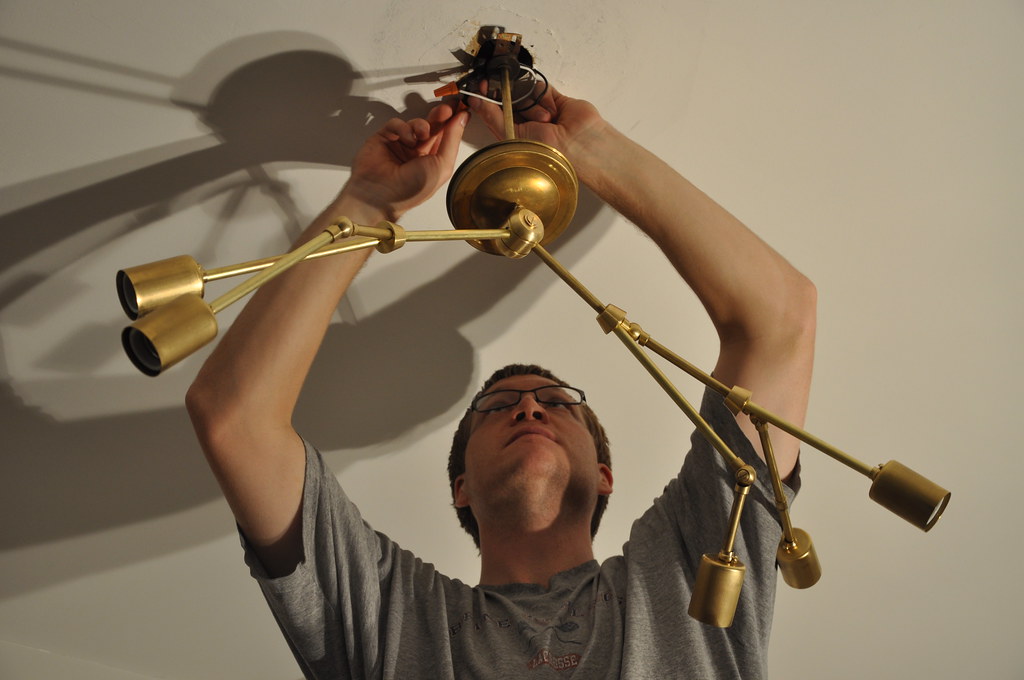
once it was all together, we tried to install it in the kitchen. we already had a mounting plate in the ceiling which conveniently had a hole in it that we could thread the top tube in to. this made things a lot easier. otherwise we would have had to install a new mounting plate first. you connect all of the wires from each "arm" in that center piece, so you are only connecting one set of wires up at the ceiling.
the first time we did this we had a short when we flipped the power back on and tried to turn on the switch. we had to take it down, and after much investigation (including borrowing a special meter from the electrical engineer i work with), we figured out that one of the wires had gotten twisted in the assembly process, so the coating had come off and the copper was touch the brass arm. once we fixed this problem, the fixture worked!
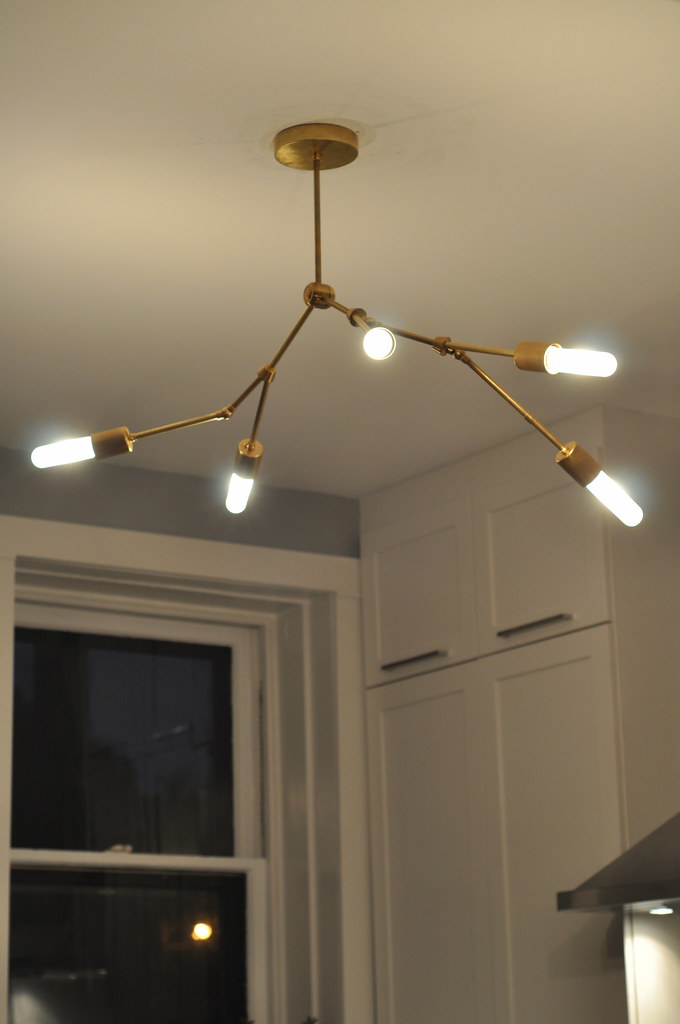
then we decided that the clear tubular 40 watt bulbs that we bought were not bright enough. and that the clear bulb had a lot of glare, so we tried out a few standard 60 watt to see if that was better.

we ended up buying tubular frosted 60 watt bulbs instead, and this works a lot better in our kitchen. the light level is really nice, which is important in a kitchen!
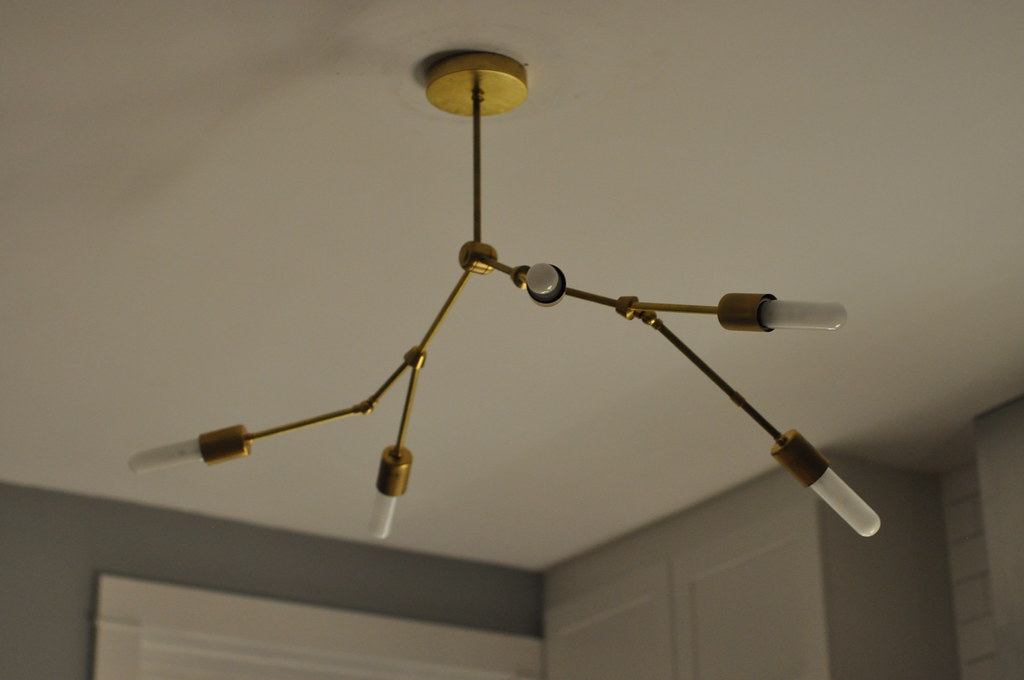
it even looks cool when it's not on. and yes, i did switch out the ceiling canopy for something more simple. i ordered the wrong canopy the first time, so when we ordered the new bulbs i got the more simple canopy (which is actually a lamp base part, which is why i didn't see it the first time).
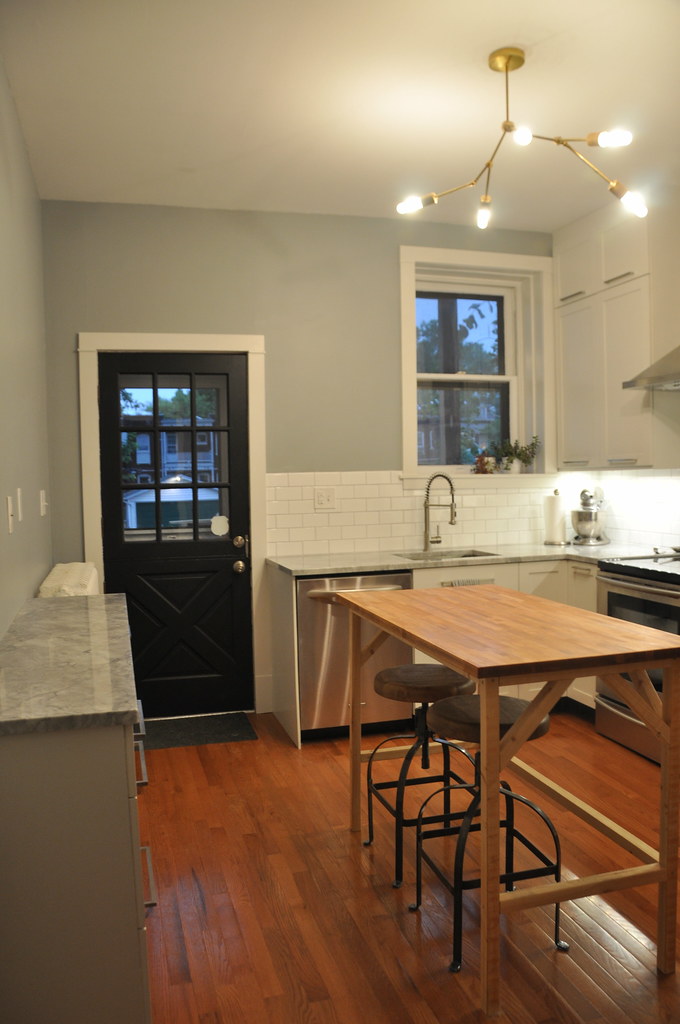
what do you think? i love how it adds something a little unexpected to our kitchen.
if you have any other questions about the fixture, let me know!
24 Responses to lindsey adelman chandelier
This is fantastic! Well done!
I'm doubly impressed. you got some serious skills!
What a cool project, it looks amazing!
That looks awesome!!! How big is it?
I want to put one in my dining room but I feel like I might need to make it bigger. Maybe not though, depending on how big it actually is.
carrie - ours ended up being about 3' wide, by maybe 18" in height? we did buy an extra 9" tube to make it hang down from the ceiling a little more. you can really adjust the overall size just by moving the arms around, so it's kind of difficult to tell you an exact size, but hopefully that helps!
Looks great! Electrical wiring is a bit intimidating but these seems pretty doable. Thanks for sharing!
I really love it. It perfectly fits your aesthetic and really makes your kitchen unique and modern. I think it was smart to make it just 5 arms, and I love the bulbs. Great job!
The parts for this fixture have been laying on my floor now for almost 6 months. I'm ready to get back at it and have a question about hardwiring it. How did you attach the fixture to the ceiling? Any advice or parts numbers would be so appreciated. Thanks so much. Your kitchen is beautiful!
melanie-
we were able to connect to an existing bracket in our ceiling - the tube is threaded and we could just screw it in to the bracket. if you have a junction box in the ceiling, you might be able to use something like part number CB1/8 from grandbrass. you can always call or email grandbrass for clarification, i had to ask a few questions and they were very helpful. let me know if you have any other questions! good luck!
Thanks Katie! I guess I was over-thinking it.
Your kitchen is gorgeous and that light is very cool. I found you through Aubrey+Lindsay and I'm glad I did!
Looks awesome Kate. I'm building a version myself and had the SAME problem with the wiring... my question is, what # wire did you end up using.
I've got it wired with #22 right now, but it seems way to thin (even though the stuff specified on her parts list is apparently #26?)
Trying to get confirmation from other people who have built this before I, you know, start a fire...
kit - we actually used thermostat wire, which i think might be 18 gauge? i can double check this if you'd like. i was a worried that this would be too thin at first, but after doing a little research, it seemed like it would be ok for this fixture... let me know what you find out, i'm still a little nervous about the wiring!
Okay, good, I basically did the same thing but with #22 that I stripped out of a 4-wire alarm wire. I've read a bunch of stuff that says you should be good with #18, but I'm personally wondering if the insulation on alarm wires is the same as what she recommends... I think I'm going to purchase from McMaster just to get a look at the stuff and see what the difference is! Thanks for the details!
Hi, Katie: I'm about to embark on this DIY myself and am wanting to hardwire it as well. Now that you've had it for over a year, do you have any tips? Did you use the same rayon covered cord that she recommended to go from the cluster body to the junction box or did you use something else? Sorry for all the Qs. I just don't want to burn my new house down :). Any help would be very much appreciated! --Mandy
Hi Mandy - we ran 16 gauge (I believe, but can't remember for sure) from the cluster body to the junction box. We used thermostat wires for the rest. We haven't had any issues with the fixture and still love it! My biggest tip is to be careful with the wiring- any nick in the rubber coating can cause issues if the wire ends up touching the copper. This is easy to do when twisting the connections. We wired ours from the outside in (started at the sockets and worked towards the center) and that seemed to work. Good luck, let me know if you have any other questions!
Hi! Curious about the canopy/lamp base. I'm trying to locate the same one, but a search on the GB site is just showing me a 10" diameter one with holes in the side...would you mind letting me know which one it is, if it's not too much trouble? I've been googling exhaustively...
Aaaaaand I found it. Hurrah!
Hey Katie,
Well done! We just built one and are also looking to mount on the ceiling - which canopy did you use and was the canopy hole also 1/8 inch for the pipe to screw into?
rachel-
this is the canopy that we used: http://www.grandbrass.com/ShowItem.cfm?ItemNumber=BAFL06NW&session.currentcategory=Bases&session.currentsubcategory=Spun Brass Bases
it also comes in different size diameters if you would happen to want a larger one. we just screwed the pipe into the ceiling mount bracket (through the canopy hole), and then just held the canopy in place with an extra slip ring. hope that helps!
So glad you posted this with pix as it's a big help to us!
I'm wondering about how you grounded your chandelier? Wasn't there a ground wire in your hard-wired receptacle?
Thanks!
snail-
good question - our house still has knob and tube wiring in all of the overhead fixtures, so we are unable to really ground any of our ceiling fixtures.
I would also like to make a hardwire version. What additional parts did you purchase in order to hardwire the light fixture? Also, what length is the tube from the cluster body to the canopy? Thanks!
i think i went with a 9" tube, but this can really be whatever you think is best.
Post a Comment