Archive for November 2010

more progress

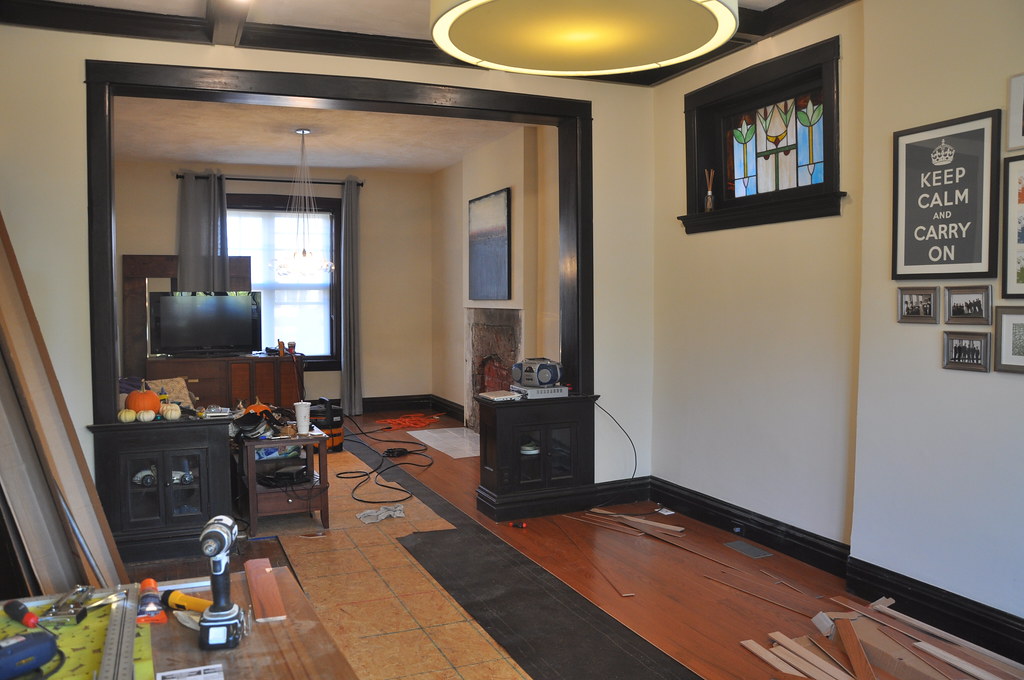
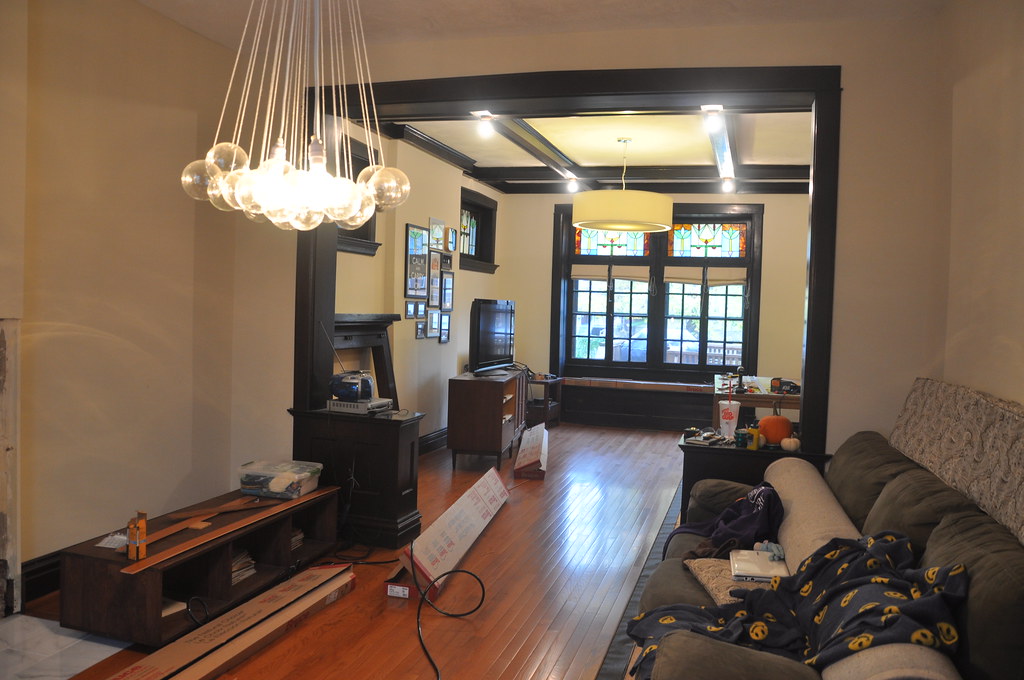
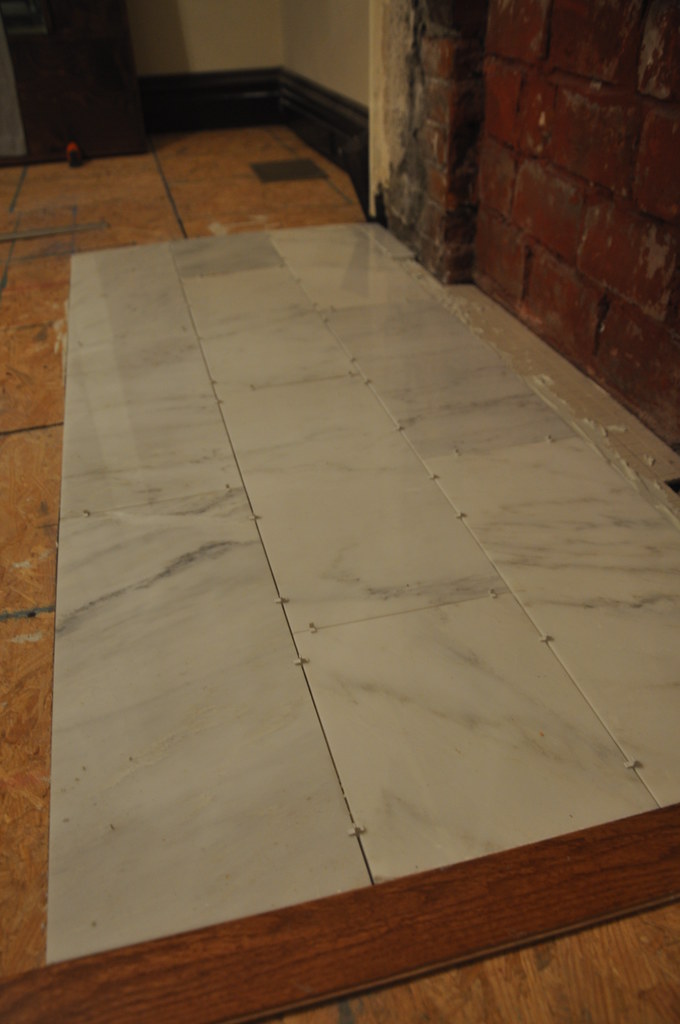
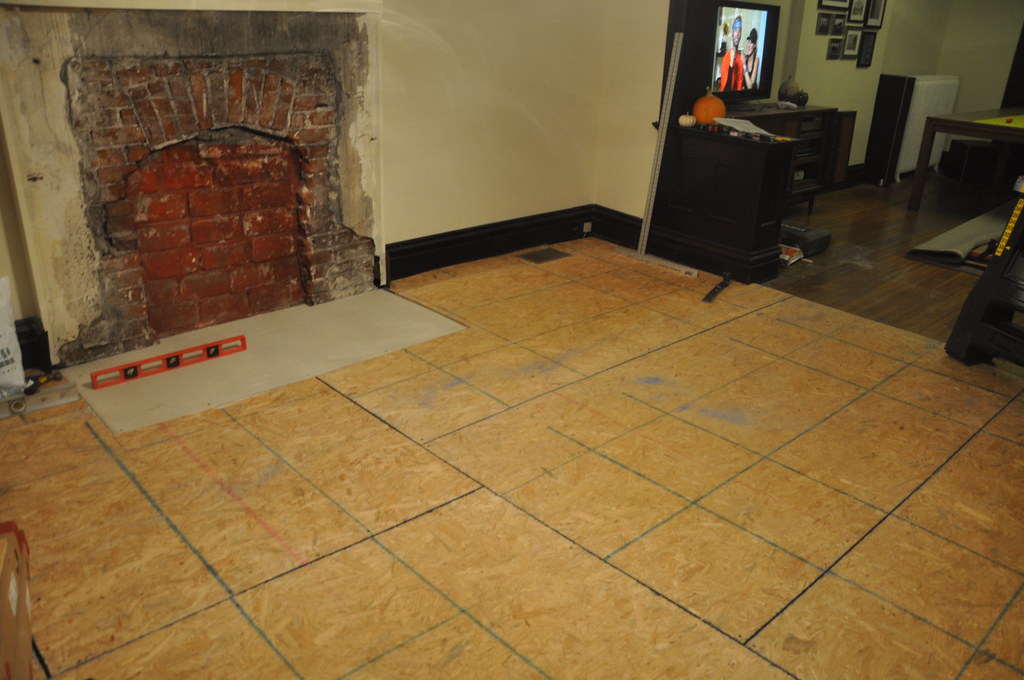
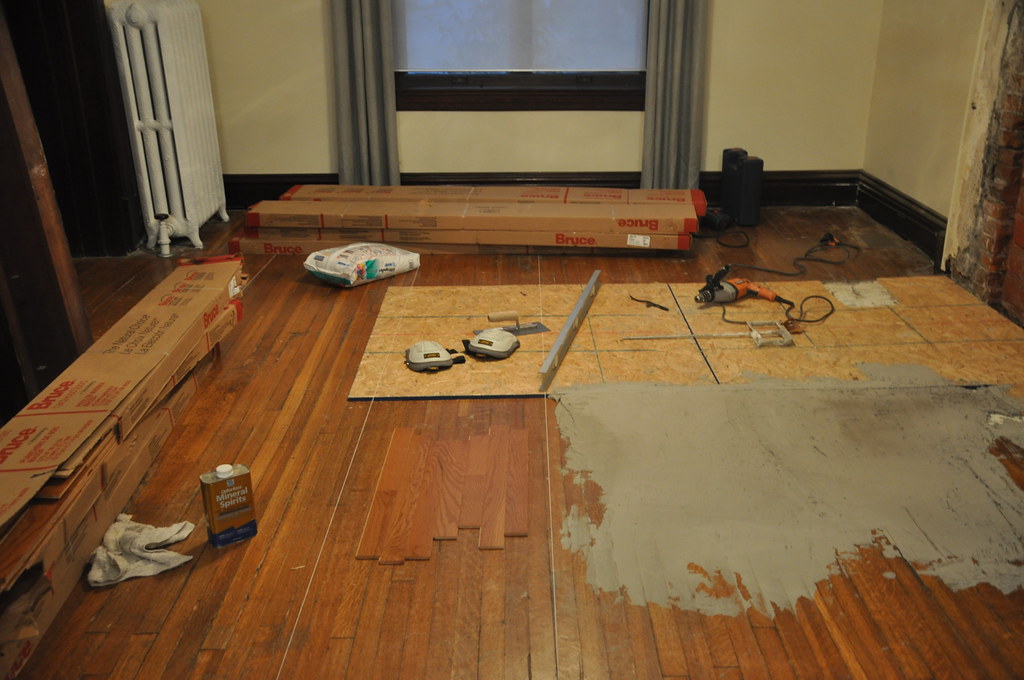
on monday we were able to finish the flooring in the living room.
DSC_0840
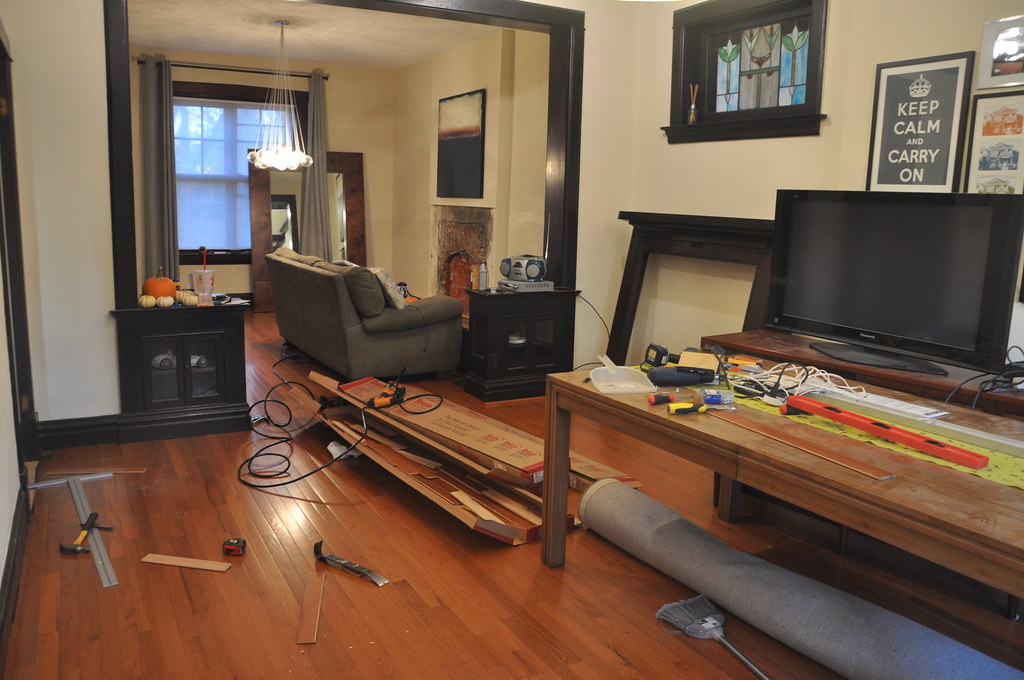
we also finished staining the shoe molding and installed most of the molding in the living room. after doing a price comparision i decided to try to stain unfinished oak molding myself instead of buying the prefinished molding offered by the hardwood floor manufacturer. i feel like i got a good stain match and this saved us some money. we wanted to get this done before moving the larger pieces of furniture back.
DSC_0844
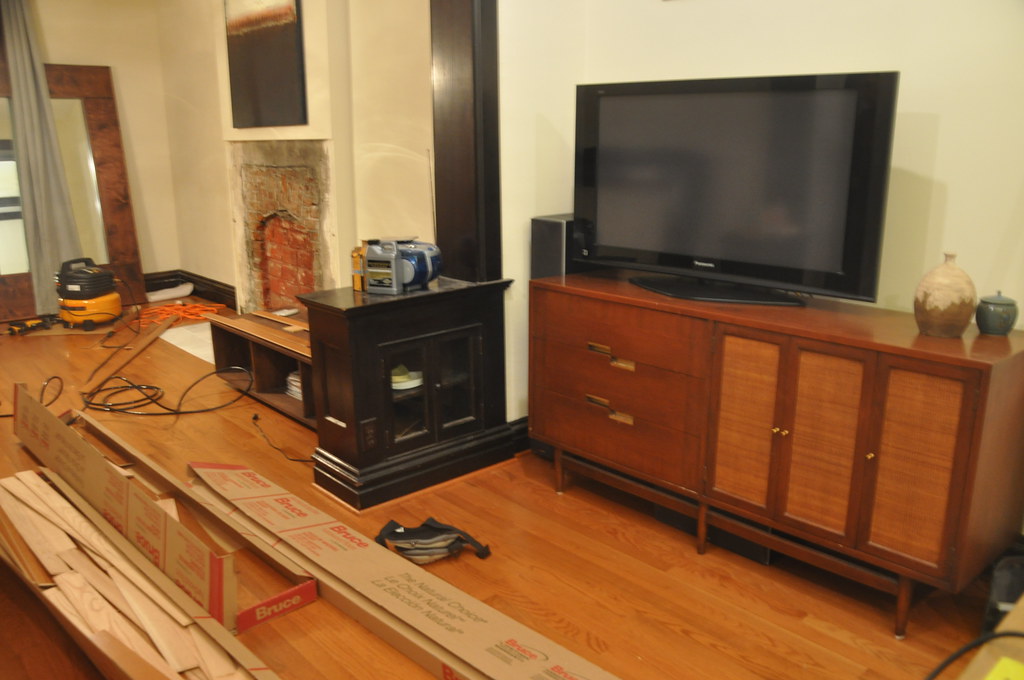
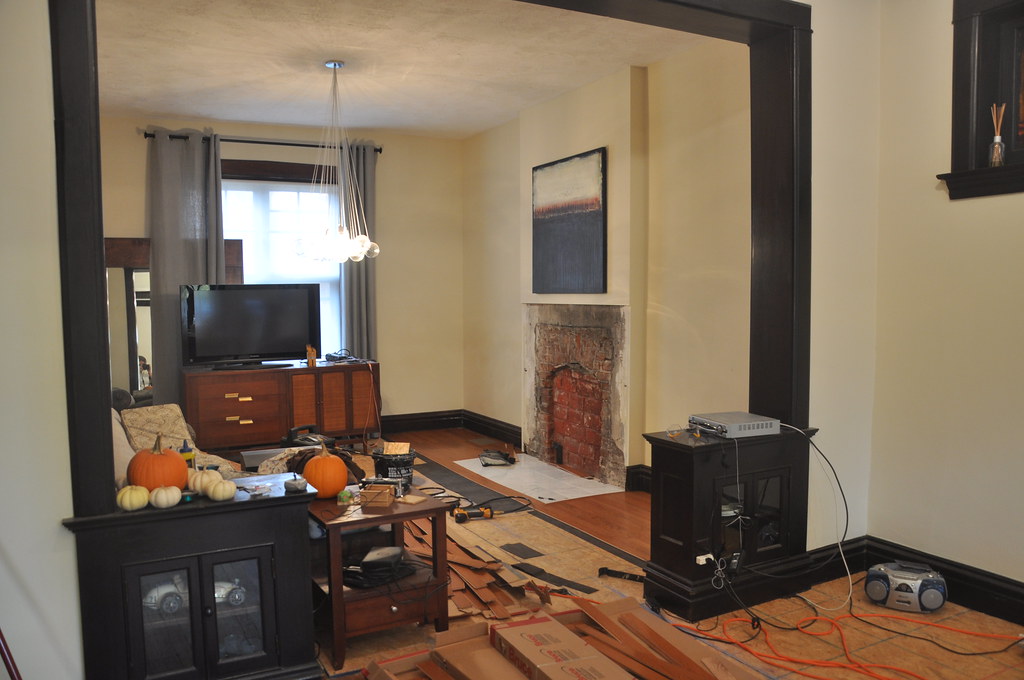
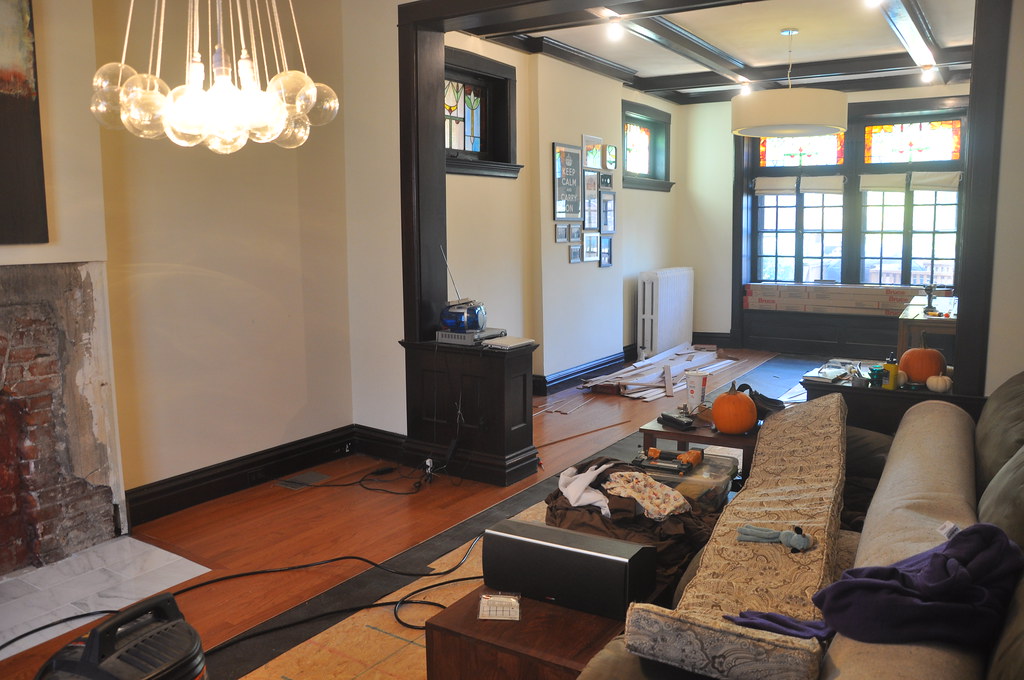
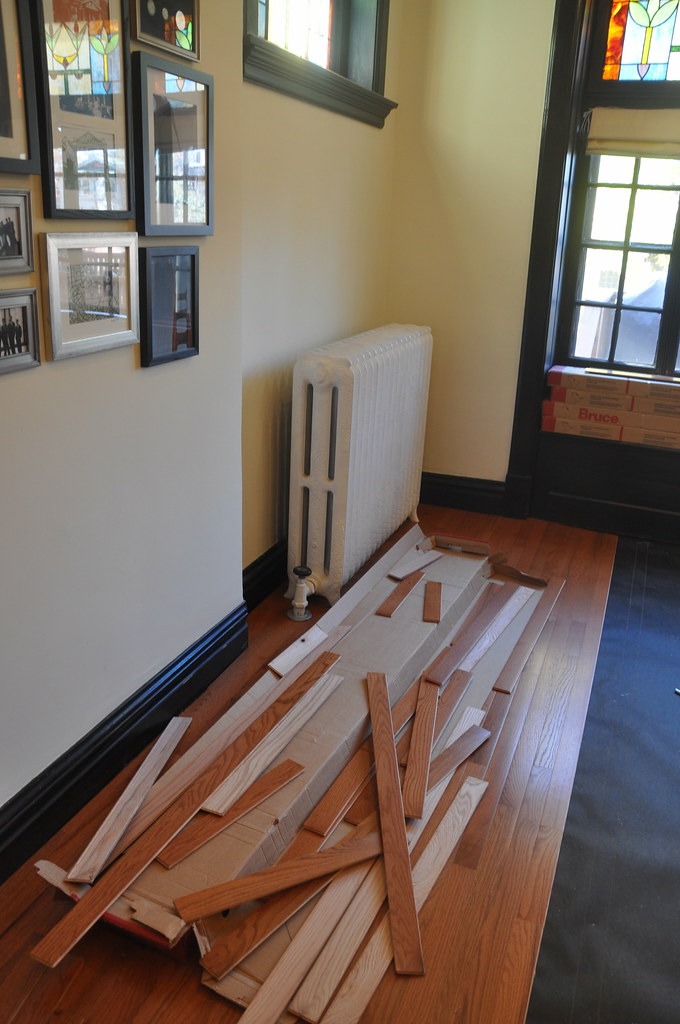
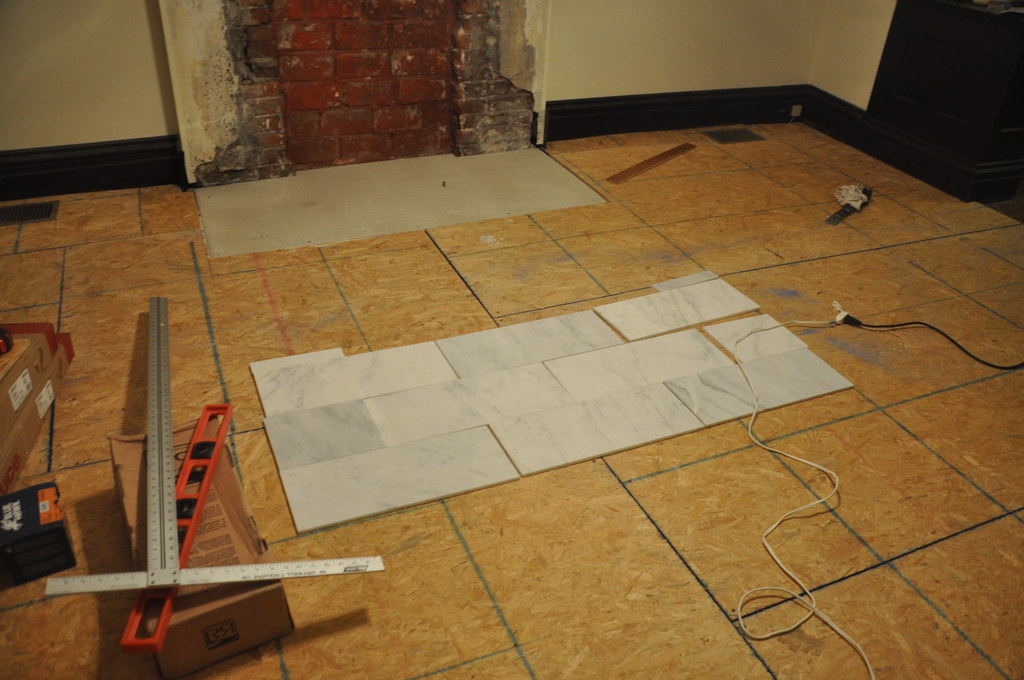
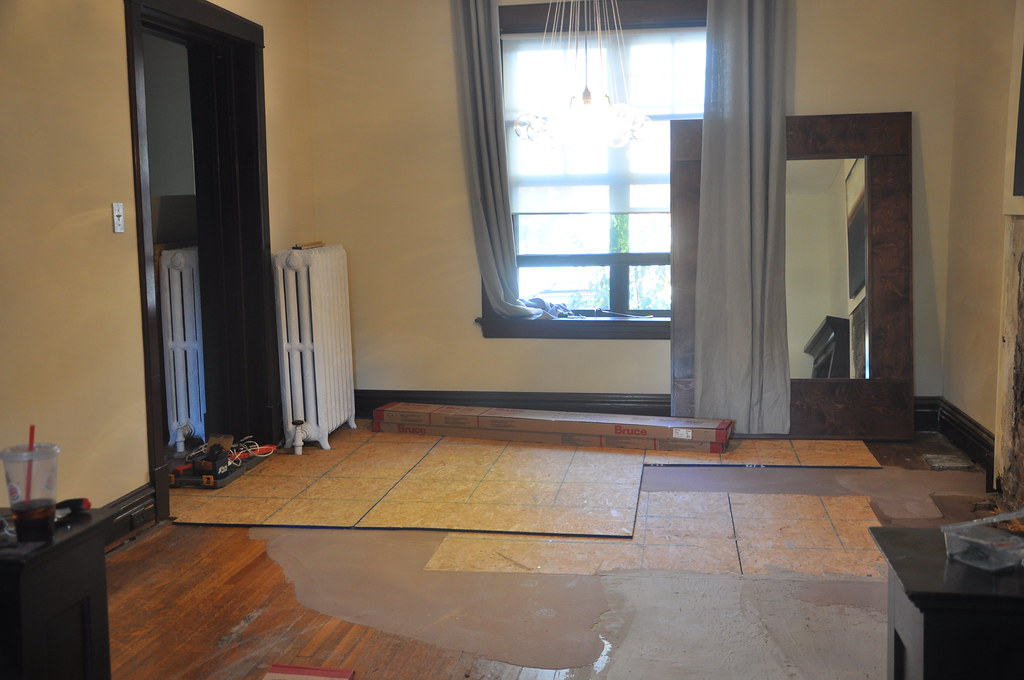
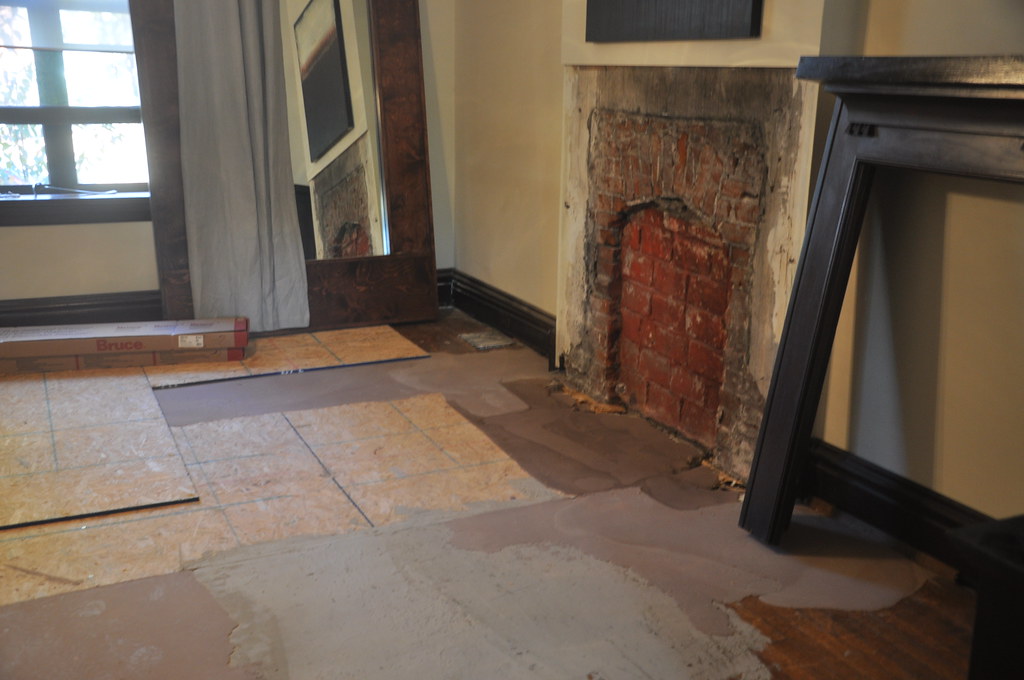
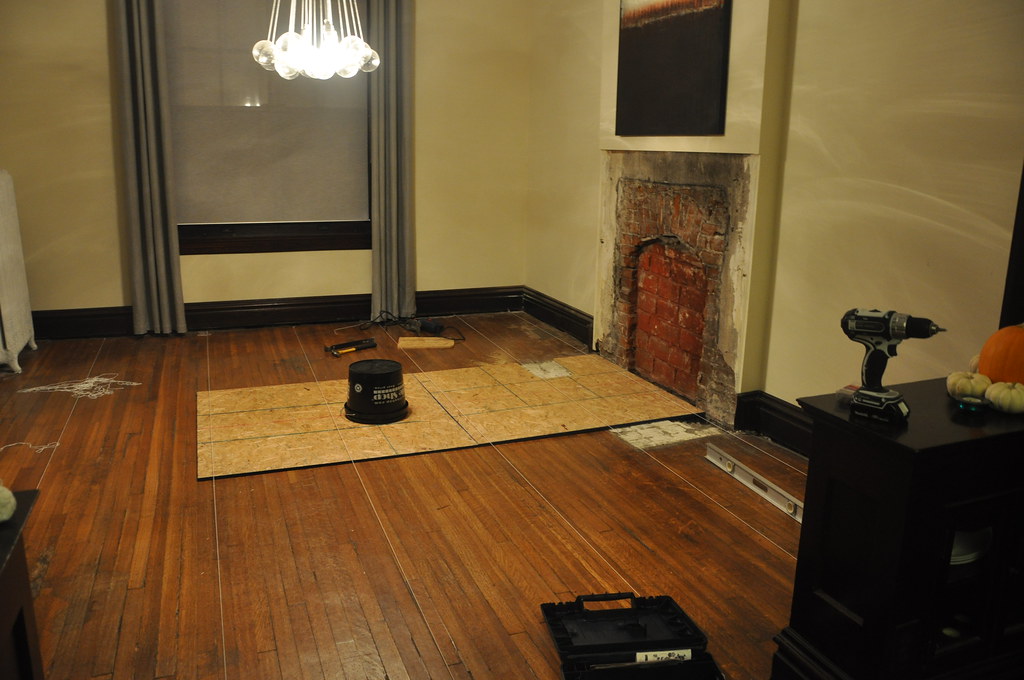
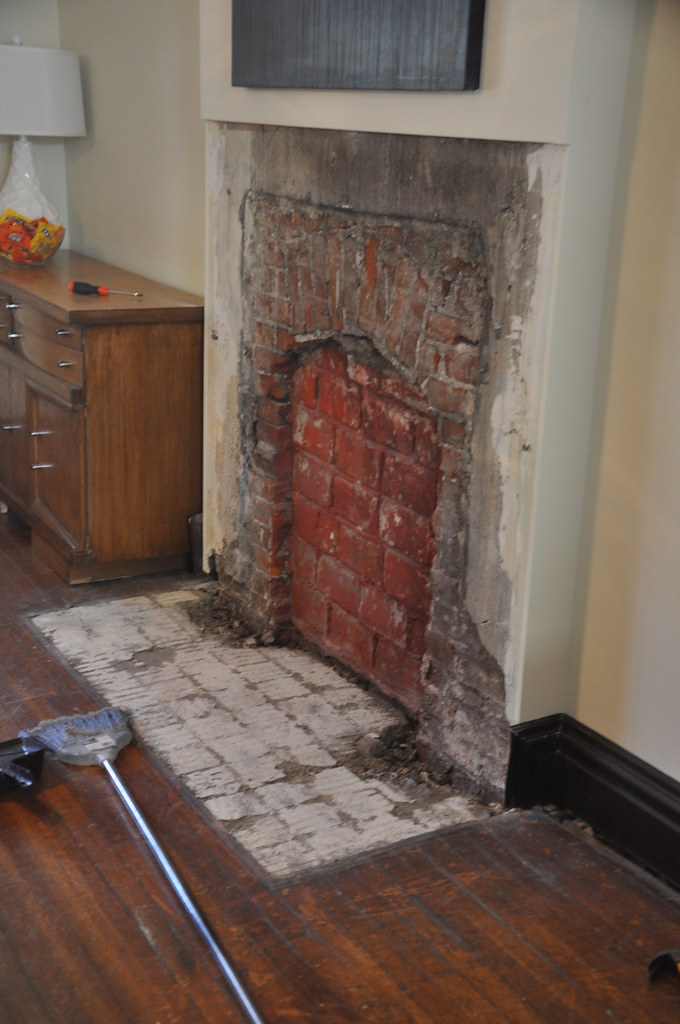
at the end of the day on monday we just had a few rows left to do in the dining room, but they are the most complicated because we have another radiator to go around.
DSC_0841
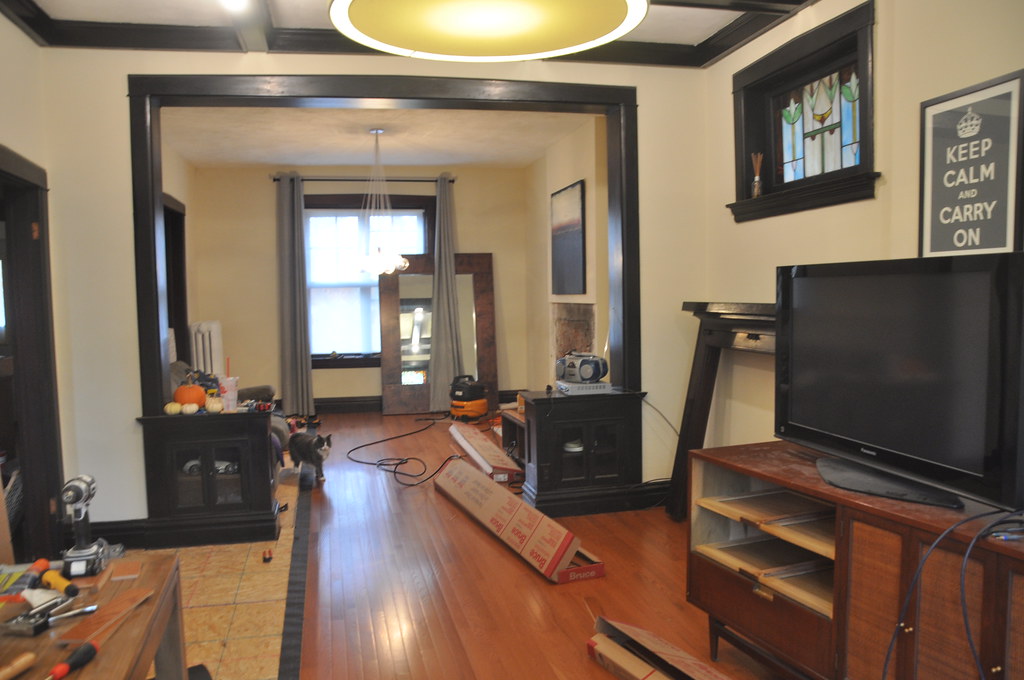
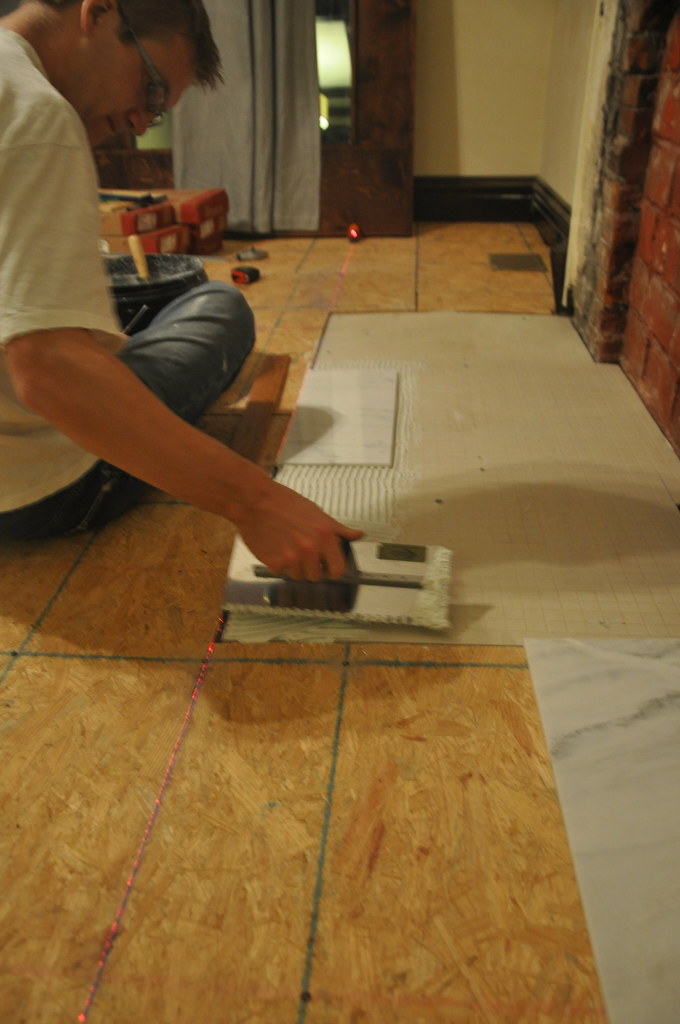
last night i had to work late, but mike was able to start installing the floor around the radiator. hopefully tonight we will be able to finish that up and install the rest of the shoe molding in the living room and dining room. and then move some furniture back!

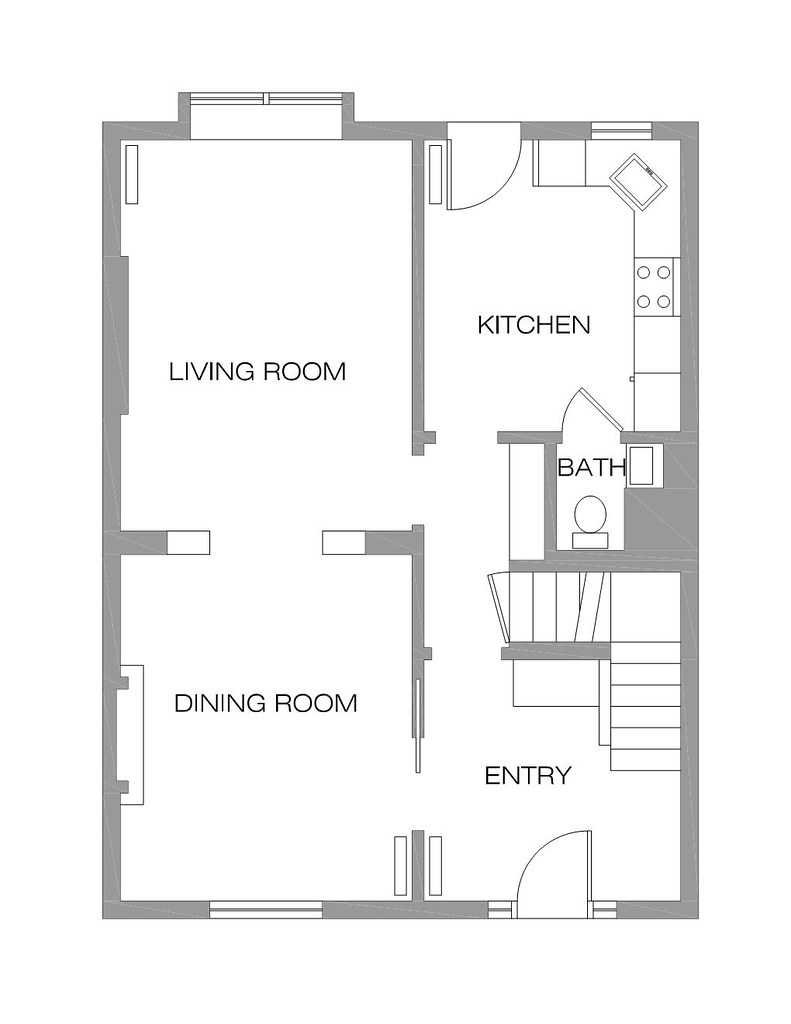
next up, the entry way, kitchen, and 1/2 bath...

3 Comments

progress

by then end of the day friday, we had the flooring complete around the fireplace:
DSC_0844

by the end of saturday we had completed portions of the dining room and living room and had started on the long runs of flooring that go through both rooms. highlight of the day is when the floor in the two rooms actually met up. yay math skills and laser levels.
DSC_0846

DSC_0847
i do not want to talk about how much time was spent trying to lay the flooring around the radiator...
DSC_0848
(it looks good, i didn't purposely try to hide it with the box in the photo) one radiator done, only 3 more to go.

on saturday we also did more floor prep in the living room (liquid leveler and osb) and put grout on the fireplace tiles. note how the tile and the floor are the same level, also glad that worked out. i made a "frame" for the tiles out of the wood flooring, but i guess it's difficult to see in this photo.
DSC_0849

we made good progress on sunday, it goes so much faster when we just have to install long runs without many cuts.
DSC_0850
i also bought and stained a bunch of shoe molding, i decided that we might as well get that installed behind some of the larger/heavier pieces of furniture before we start putting things back in place.
DSC_0851

we'll see how much progress is made today (took the day off of work). i'm hoping to have the flooring done in both of these rooms, and possibly some shoe molding installed.

overall thoughts on this project so far:
- i wish we would have looked into the price of just buying a floor stapler. i have a feeling that when we're done with this, we will have paid more in rental fees than if we would have just bought one ourselves.
- my body hurts. i didn't realize how much hard physical work this would be. i'm getting old.
- i'm excited that the flooring is in, and is looking good, and is in great condition. i think the type, color, and board width look great in the house. i am really happy with that decision. but it is kind of bittersweet... i wish we would have been able to save the original floors. these floors just look so, well, new, and i like the character of old floors in old houses. i'm sure it will make a difference though once the furniture is in and we're not just focusing on the floors. these rooms will finally be done, and i'm looking forward to feeling like the house is actually clean. with the old floors, the house never felt clean to me because of all of the dirt, stains, and wood splinters that we had. it also didn't help that we could see into the basement in several places...

11 Comments

tiling the fireplace

we're making progress - we tiled the fireplace hearth.DSC_0832
i spent way too much time deciding the perfect layout for the marble tiles.
DSC_0831
i discovered that cutting marble tile is a lot more difficult than cutting ceramic tile. the tiles kept breaking. good thing i only had to make a few cuts.
DSC_0834
laser levels and chalk lines are you friends when tiling.
DSC_0835
we might need to move tiling the rest of the fireplace higher up on our project to-do list...
DSC_0837
all we have left to do is grout!

3 Comments

floor prep: part 2

what i learned today:


- it is easy to get caught up in project planning/supply buying at the hardware store and leave your purse behind on a pile of osb.

- there are still nice people in the world who will find your purse and then look around the store until they find the woman with a cart of osb, and no purse. thank you nice guy in the green striped sweater. you made my day.

- hardwood floor boxes are heavy. next time, we should try to have all of the prep work done before bringing the floor boxes into the house. we've had to move them from room to room multiple times already and i swear that they are just getting heavier.
DSC_0823

DSC_0824
- liquid leveler is amazing. we should have just started with the liquid leveler and not the floor patch.
DSC_0825

DSC_0827
- we really under estimated how long it would take us to prep the floor for the underlayment, and then install the underlayment. i was hoping to be mostly done with this by the end of the weekend. we only have the dining room done. but, the dining room is the most complicated room. and we did get the backerboard cut and down and ready for the tile. hopefully we can continue to make progress on the flattening/leveling and the underlayment this week so that we can start to install the flooring next weekend.

- and lastly, a cat, given the chance, will indeed play with a mouse. note to self, stop buying cat toys that look like mice. because it might take a little while to realize that the toy mouse that the cat is playing with is not really a toy...

2 Comments

it's here!

the floor arrived today! since we ordered it online, it arrived by freight. i have to say, i have been very impressed with this entire process - i had to contact both the store and a few different freight companies (it changed hands a few times to get here) earlier in the week to figure out the delivery day so i could schedule to be off work in advance. everyone was very nice and helpful. the truck was supposed to arrive between 12 and 3 today, but the driver ended up calling me at 9am (i was at work) and said that he would prefer to either do our delivery first or last because the rest of his deliveries for the day were out of town. i ended up leaving work at 12 anyway just to be safe, and he called me several times throughout the afternoon giving me an update on his schedule. he didn't end up at our house until 5:30, but it actually worked out perfectly because mike was home from work by then. originally the plan was that i would have to move all of the boxes of flooring into the house myself (19 boxes at approx. 50 lbs each, um yeah...) because mike doesn't have any extra pto this year. i did help to unload the truck, but i don't think i would have made it unloading all of the boxes on my own. the driver technically isn't supposed to help move the boxes, they are only responsible for curb side delivery. although, the nice driver did tell me that if i had been the only one home he would have helped me get everything at least closer to the house.


one of the boxes had come open in transport and the driver made sure to point this out and write up a claim form for us. it doesn't look like anything is damaged or missing, but i feel better knowing that if we do need to get the box replaced, we shouldn't have any trouble.

i, of course, went ahead and started to lay out some of the floor from the open box just to see what it will look like. while the new hardwood doesn't have the same variation of the existing, i think it will look so nice when it's installed.
DSC_0819
the color is a good match, can you spot the new floor in the photo? you can also see our first attempt at floor patch. we actually ended up going back to liquid leveler to fill out the dip. we went to lowes originally to get the liquid leveler but the person working in the flooring department talked us into this floor patch instead. while it is less expensive, we were having a hard time using it to feather out the edge of the osb, so we decided to use liquid leveler instead. we've already put down a couple of bags of it (this photo was taken earlier in the evening) and it is working much better.

by the end of the weekend we hope to be done with the leveling/flattening and potentially even be done with installing the osb underlayment. wish us luck! it is also mike's last home rugby game of the season, so we will need to take a break from floor work for that. hope you all have a good weekend!

1 Comment

floor prep: part 1

last night we started the floor flattening/leveling process. we put some nails into the floor along the outside edges of the dining room and ran some strings between the nails to see where the floor started to dip. we are using 1/2" osb to build up the floor in the worst spot and will be feathering out the egdes of the osb with floor patch. the floor will still not be perfect, but this should make it good enough to install our underlayment followed by the new hardwood.
DSC_0813
and if you're ever looking for a fun game to play with the cat, i highly recommend nailing string to the floor. this will provide hours of entertainment for both you and the cat. i'm pretty sure trevi hates me now.

1 Comment

the demo begins

over the weekend we started the prep work process. first, we started to move some of our smaller pieces of furniture upstairs and put away some of the misc. decor items. our plan is to just move the larger furniture (table, couch, tv stand) around the first floor as we work on the floor. then we started some demo:
DSC_0799
we removed the mantel since it was sitting on the tile. strangly the mantel was only attached with 2 screws that both went into very loose anchors. i think we will be finding a better way to attach it when we reinstall. the tile demo was fairly easy. i actually enjoy demo work...

next up - leveling and making the floor flat(ish). we live in a 99 year old house - let's be real - it is not going to be perfectly level. but, there is s slight dip in the middle of the dining room that is noticeable when you walk through the room. there is also a pretty significant slope at the back of the living room. we are hoping that we can get the floor to be within the recommended tolerance from the floor manufacturer. something that i'm having a hard time with is the difference between "level" and "flat". but we've come up with a complicated grid of strings and are using a 4' level (more as a straight edge and less as a level), and i think we have a plan that just might work. i am hoping to get this done by saturday.

after flattening the floor, we will be installing osb underlayment on top of the original hardwood. we have debated this so many times, but if we want to install the new floor in the same direction as the existing floor (which would be the long way of the room, and is how i want to install it) we need to either remove all of the original hardwood or install an underlayment before installing the new floor. things to consider - we are going to have to work around 4 radiators, the kitchen floor is already built up higher, and we will be living in the house with our pets during this project. due to those reasons, we have decided to go with the underlayment approach. this will also help us even out some of the smaller imperfections before installing the new floor. we hope to have this done by the end of next week.

at the same time, we will also need to do the floor tile at the fireplace. before we tile, we will need to do some prep work to the area under the tile. we will also be removing the birch ply that we put down in our kitchen. (the reason why we have birch ply can be seen here, installation pictures are here and here, and the final pictures are here.) it seems kind of silly to remove something that we spent so much time on just 2 years ago, but removing the birch allows us to install a thinner underlayment throughout the rest of the house because i want the new hardwood floor to run right into the kitchen at the same level. and by the way, the birch ply has not held up at all with the dogs. it scratches so easily and most of the finish has come off at this point. it was a decent/inexpensive temporary solution though, and much better than carpet! since we will be installing the new floor in the kitchen and won't be doing any other kitchen upgrades for awhile yet, we are going to have to be creative with how we install the floor so that we can work around it in the future. lastly, we will be also installing the hardwood in the half bath off of the kitchen so we will be removing the toilet and vanity. good news is that we are just going to replace the toilet and vanity with something new, so we'll have another fun project to work on as soon as we're done with the floors! wait... is it sad that i think installing a new toilet is good news??

the hardwood floors should be here by the end of the week and the tile should be in at the beginning of next week. we will need to let the new floors acclimate to the house. if we can keep on schedule, we're hoping to start installing the new floors next weekend. my father-in-law may be coming out to help with the installation, which would be nice because with mike's work and rugby schedule, there is a good chance i will be on my own at some points during the installation process.

i'm realizing that this is a really long post and probably not at all interesting to most of you. so in conclusion, we will be installing new floors in all of these areas:

20101101 floor plan

1 Comment

search

Swedish Greys - a WordPress theme from Nordic Themepark. Converted by LiteThemes.com.