as you probably guessed from the last post, we have been working on tiling the rest of the fireplace. we were planning on waiting a little while to start the next project, but we were so so close to being completely finished with the dining room/living room. and then we found the perfect fireplace grate. and then my mom came to visit and wanted to help with a project...
as a reminder, this is what we started with:
the fireplace is obviously non-functioning, but is still a focal point of our dining room. the bricks were not in the best condition and the floor tile was falling apart. when we decided to install the new hardwood floor, we started to also think about what we could do to the fireplace.
we ended up using 8"x24" carrara marble tiles for the hearth and installed the tiles when we worked on the hardwood floor.
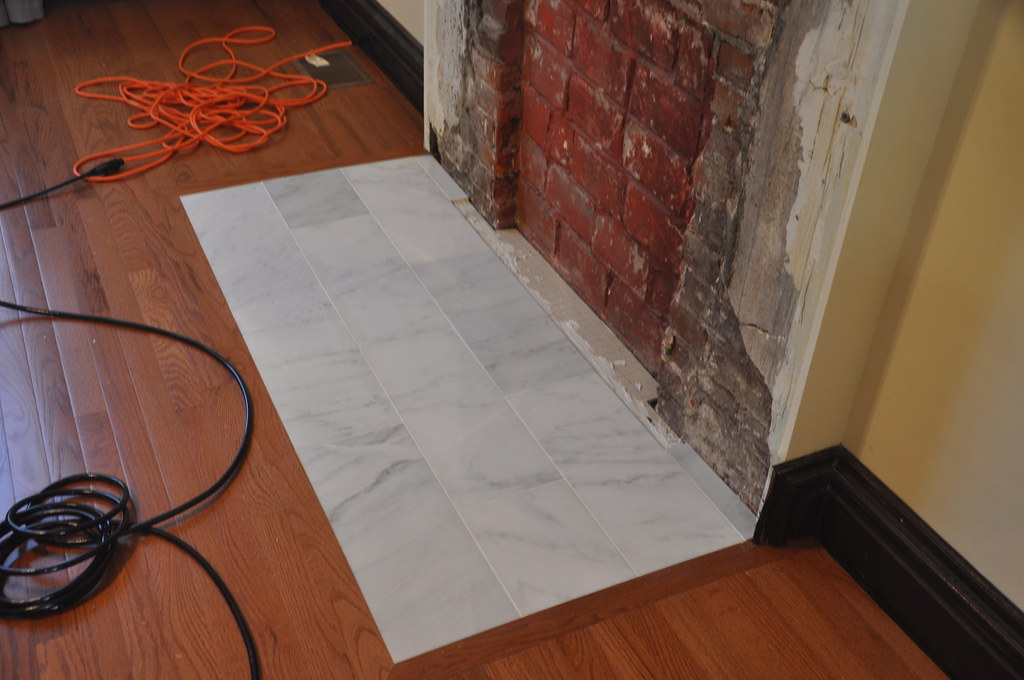
we then we simply re-installed the mantel and left it at that.
a couple of months ago, while at our favorite local architectural salvage, we found the perfect fireplace grate. even better, it was a really good price. most of the antique grates that i had found were very ornate (and expensive - most were $300+). i was looking for something more simple so when i found one, and then saw the price tag ($75), i quickly bought it.
in order to install the grate we needed to tile around the rest of the fireplace.
first we built a frame for the backerboard and included a recessed area for the grate. attaching the studs to the crumbling brick was difficult.
next we installed the backerboard and a couple of pieces of scrap wood so that we could later install finish wood pieces on the sides. for some reason the sides of the mantel were hollow and we wanted to box them in so we could have a finished edge for the tile.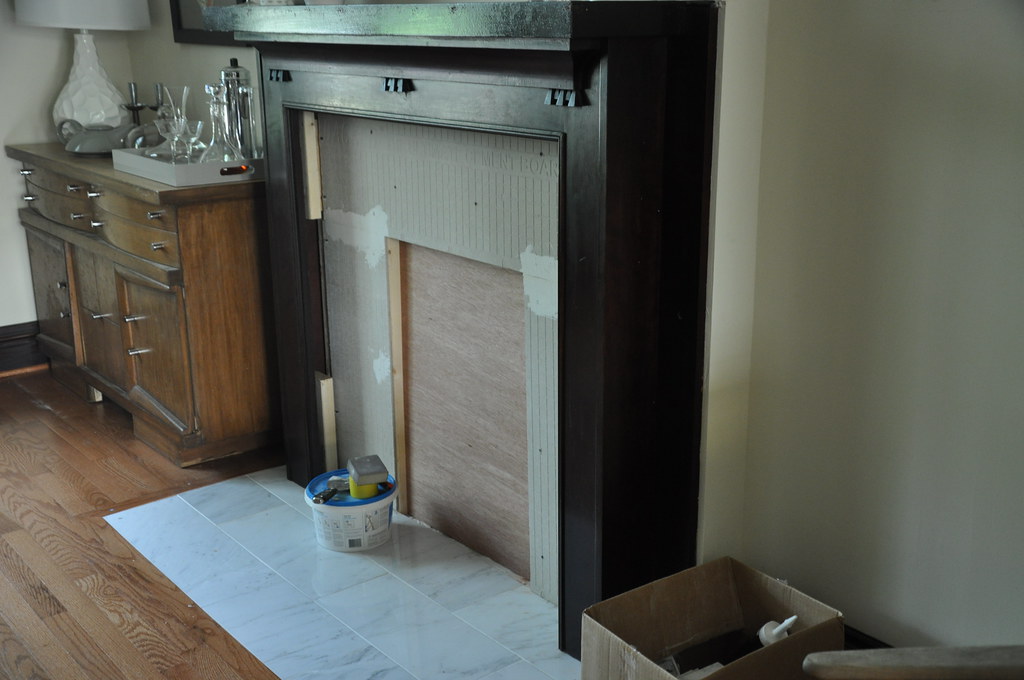
next was the fun part - tiling!!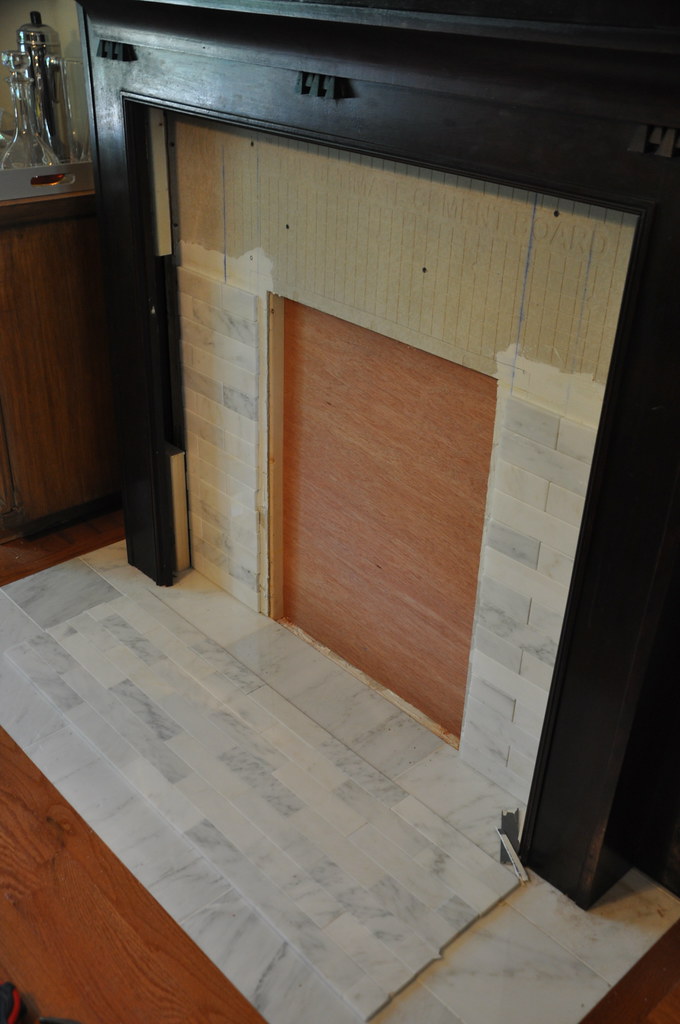
i wanted to use the same cararra marble that we used on the floor, only in a smaller format. i was really excited when i found these 2"x8" tiles. first we installed the sides, and then had to wait a week before installing the rest. you can see how we were laying everything out first in the photo above. some of the tiles were more gray and i wanted to make sure they were evenly mixed in.
to bridge the gap over the area where the grate would go, we had to add a temporary support piece to hold up the tiles while they dried. looks a little strange, but it worked.
a few days later, i painted the recessed area black, we sealed the marble, and then we grouted.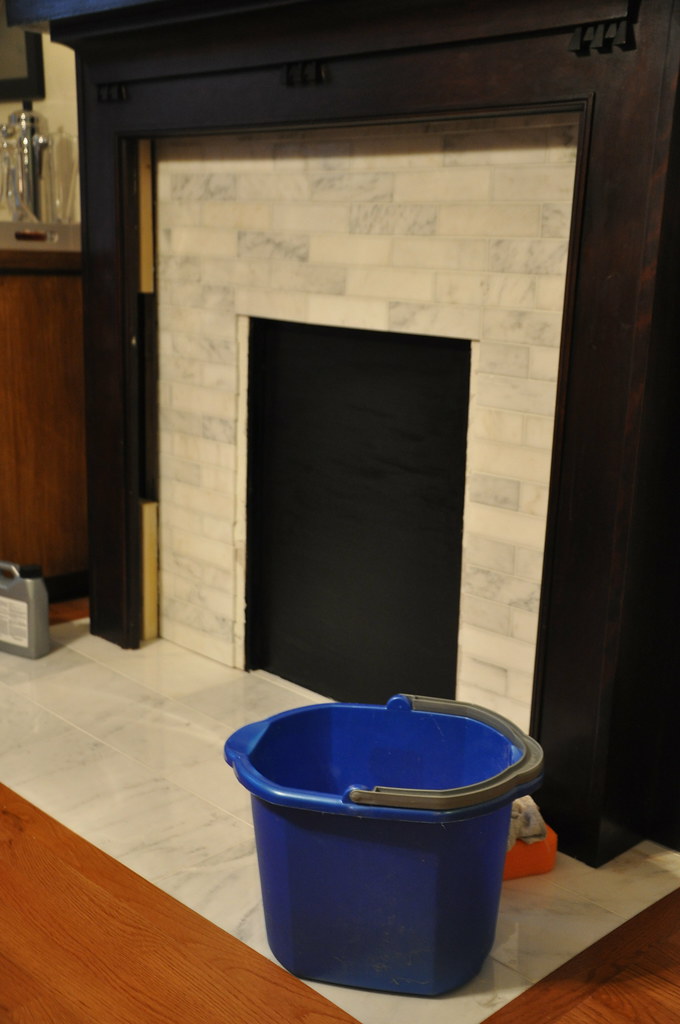
we cut and stained 2 pieces of oak to close off the ends of the mantel. finally, we installed the antique grate. the grate was a little tricky because it actually is 2 pieces. we were able to hold the frame portion in place with some wire and screws, and then slide the grate right in.
final result - i love it. it is exactly what i was hoping for. we left the grate in the same condition as we bought it, so it is not perfect. i really like how the grate and the dark mantel look with the bright tile and the clean lines. i wanted something that was more modern but still went with the style of our house, and i think that the mix of the antique pieces with the format of the tile is a great combination.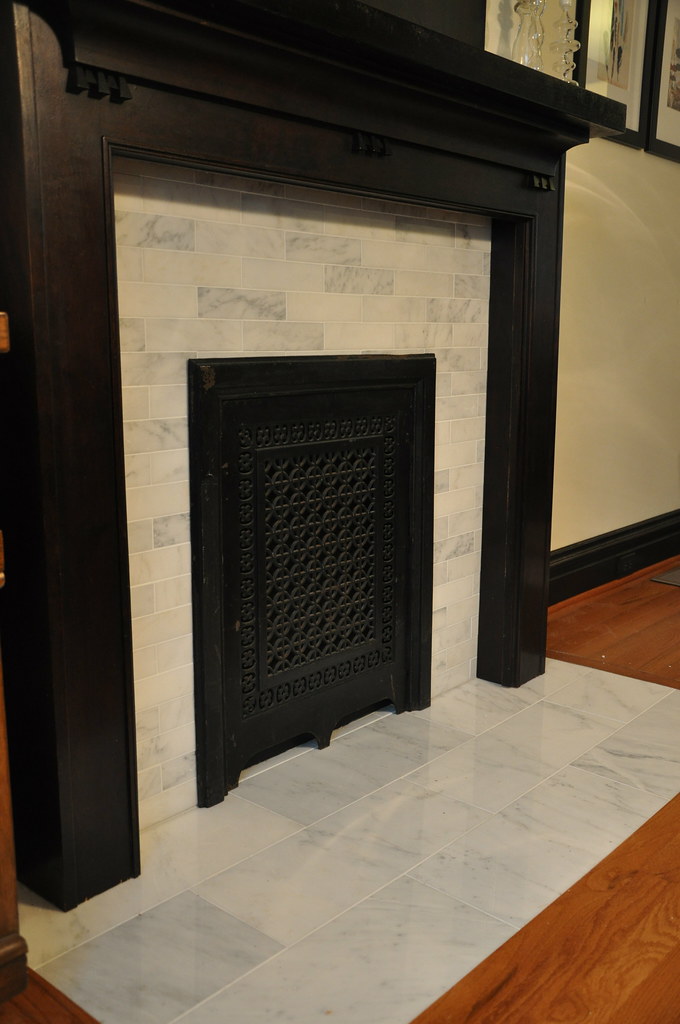
and as soon as i clean the dining room, i'll make sure to take a few pictures so that you can see how the fireplaces fits in to the entire room.
search
blogs i follow
-
9 hours ago
-
16 hours ago
-
4 days ago
-
5 days ago
-
2 weeks ago
-
2 months ago
-
5 months ago
-
5 months ago
-
1 year ago
-
2 years ago
-
2 years ago
-
2 years ago
-
3 years ago
-
3 years ago
-
3 years ago
-
5 years ago
-
6 years ago
-
6 years ago
-
6 years ago
-
6 years ago
-
6 years ago
-
6 years ago
-
7 years ago
-
7 years ago
-
8 years ago
-
8 years ago
-
8 years ago
-
9 years ago
-
9 years ago
-
9 years ago
-
9 years ago
-
9 years ago
-
10 years ago
-
10 years ago
-
10 years ago
-
10 years ago
-
10 years ago
-
10 years ago
-
11 years ago
-
11 years ago
-
11 years ago
-
11 years ago
-
12 years ago
-
13 years ago
-
-
-
-


