

when i saw this post on the brick house last summer, i thought that the ace hotel shelving unit was the coolest thing ever. then she went and figured out how to make one of her own. and i wanted to be her new best friend. morgan also has great instructions on how to refinish eames shell chairs, which i plan on following when we finally get our new bases. if you don't read her blog currently, you should probably go check it out.
once i decided that i needed (yes, needed) to make a similar shelving unit of my own, i thought that the den would be a good place to build one. with the brick wall the room already had an industrial thing going on and i thought that this shelving unit would work really well in there. plus we needed storage/display space. i have lots of stuff.
i began by reading morgan's post about 100xs until i had figured on what pieces she used and what went where. then i started sketching my own design on my chalkboard wall. i could even sketch it life size to know how much space i wanted between shelves. i came up with something similar to this: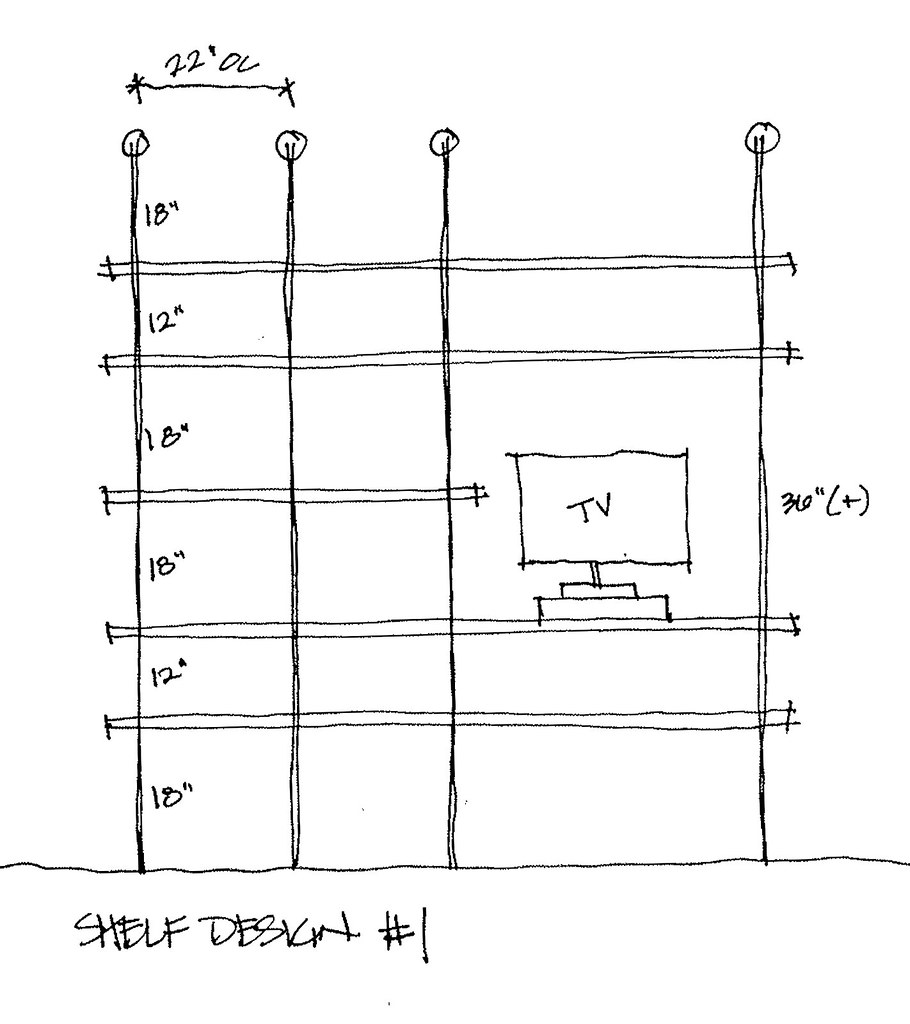
i made an excel spread sheet of parts (yes, i'm an architecture dork) and started to buy a few at a time during our random lowes trips. when my parents came, they were kind enough to help us with the rest of our supply list. i'm glad we decided to work on this project when they were here, it was much easier to assemble with 4 people.
the first thing we did was fit everything together to make sure we had the layout we wanted. at this point we made a few modifications and exchanged a few pieces. we thought the original design was just a little too tall.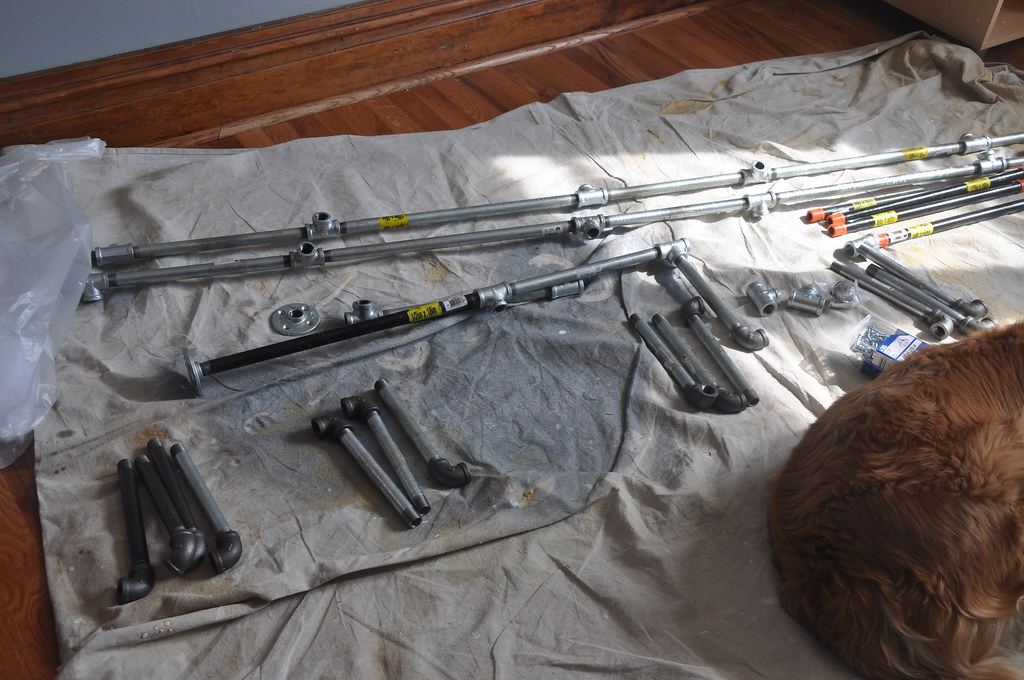
reese thought he was helping. cooper is afraid of construction so he was hiding.
next we took all of the pipes and fittings outside, cleaned them, and spray painted them black. honestly, removing all of the stickers and cleaning them was the hardest part. we also drilled the holes in the boards and put one coat of stain on the shelves. then we started to assemble.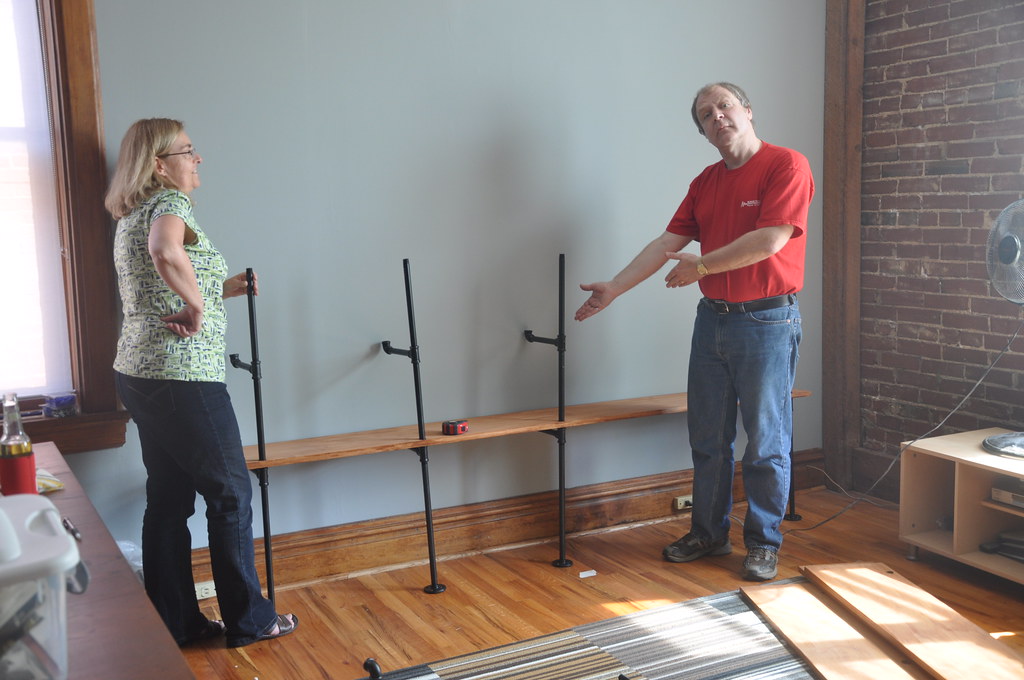
i don't know what dad is doing, i guess showing off his shelf building skills?
we tried to keep things straight and level and tighten the joints as we went. it went together pretty quickly.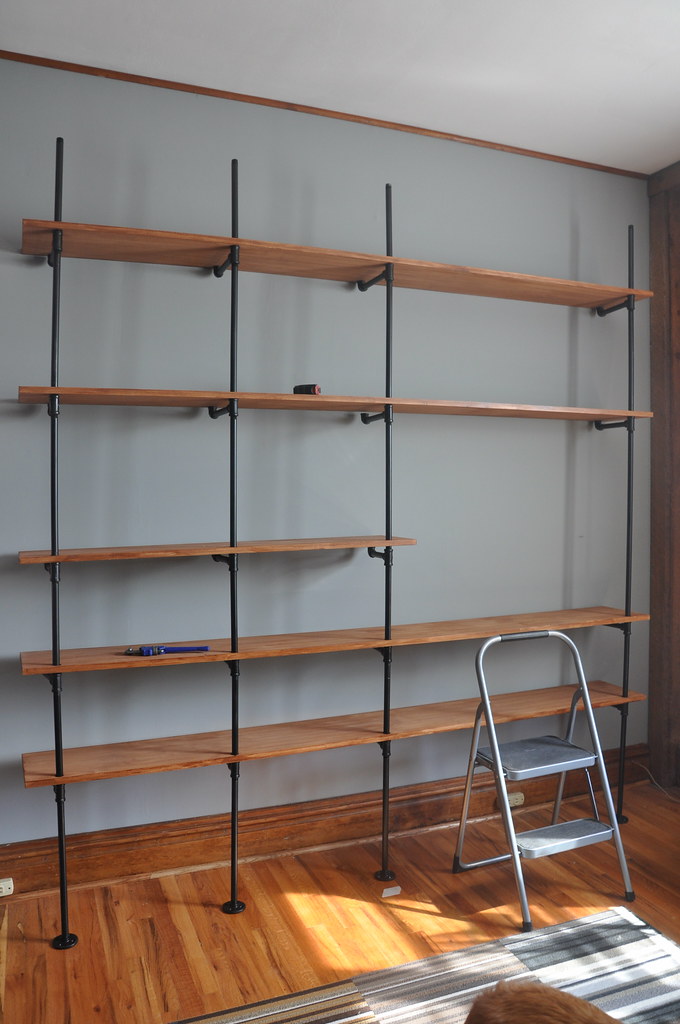
the last thing we did was attach it to the wall at the top with the flanges.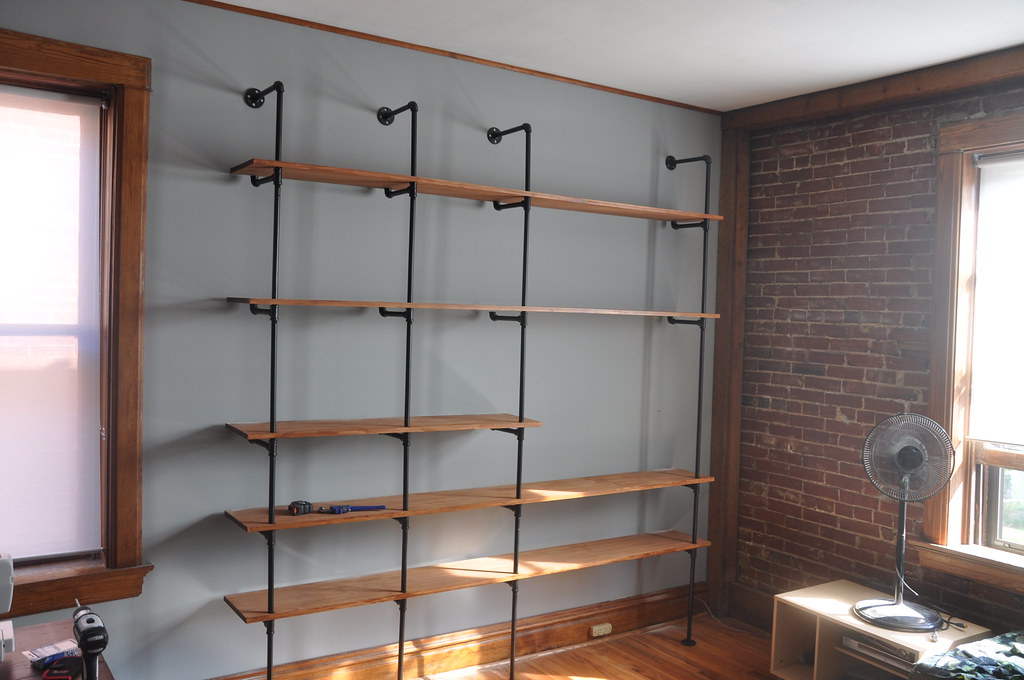
it is only secured to the wall at the top, the bottom flanges are just resting on the floor (with a black foam pad thing between the flange and the floor to help protect the floor from scratches). it is already stable, and i think it will just become more sturdy as we put weight on it. last weekend we finished up the final coat of stain and poly, we still need to touch up the black paint in a few places and the wall in a few places.
i will be flying to cleveland this weekend to visit a friend, but hopefully mike will be motivated to finish up the shelf project for me so we can start to put the room back together. then i can take some true after photos!
have a great weekend everyone!
blogs i follow
-
1 day ago
-
2 days ago
-
2 days ago
-
1 week ago
-
1 week ago
-
10 months ago
-
10 months ago
-
1 year ago
-
2 years ago
-
3 years ago
-
3 years ago
-
3 years ago
-
4 years ago
-
4 years ago
-
5 years ago
-
6 years ago
-
6 years ago
-
6 years ago
-
6 years ago
-
7 years ago
-
7 years ago
-
7 years ago
-
8 years ago
-
8 years ago
-
9 years ago
-
9 years ago
-
9 years ago
-
9 years ago
-
9 years ago
-
9 years ago
-
10 years ago
-
10 years ago
-
10 years ago
-
11 years ago
-
11 years ago
-
11 years ago
-
11 years ago
-
11 years ago
-
11 years ago
-
11 years ago
-
11 years ago
-
12 years ago
-
13 years ago
-
13 years ago
-
-
-
-
17 Responses to shelf: the details
Wow, looks great!
Lauren @ chezerbey
Your dad was doing his "dad" thing. Love that photo! The shelves look amazing! Very nice!
Wow, is that Vanna White in that picture with your mom?!
I'm glad you spray-painted the pipes black- that does a lot for the design. Love it!
wow wow wow! this looks fantastic! now i want to make one!! but where to put it.....
can you tell me what brand/color you used for the stain? I love it.
Looks awesome. Two questions:
What are the dimensions of your longest board?
Did you have to find studs to screw in the flanges at the top?
sarah - i think that the longest board is 8'. we used masonry anchors at the top flange, this is an exterior wall on our house so it is brick under the plaster.
OMG.. my dog's name is Reese too and she looks like yours!!!! craziness :)
Oh... and I meant to say that this project is really cool. turned out great!
Do you think these shelves would hold LPs? I didn't know if it could support that much weight but from what I have seen, I think it could... thoughts? Of course- yours looks great!
natalie - i think that these shelves would be fine for lps. i have mine loaded up with books, and they are doing good. i think you'd want to make sure the shelves were very secure in the attachment to the wall, and i would try to use shorter spans between supports. glad you like it!
I came across your blog while researching these shelves. I just love how they turned out and I've also enjoyed looking through some of your other posts. Great work!!
Very Cool. Would you share your excel spreadsheet of parts?
Andrew- I would be happy to share but unfortunately the file was on an old computer that I no longer have access to... Sorry about that!
I'm working on setting up my new place on a budget, and thought this would be a great idea for my living room storage / TV area. Would you mind if I asked you about how much it cost you to do this project?
jonathan-
i can't remember the exact budget, but i want to say that all of the plumbing parts were a couple hundred dollars? i do remember that it cost more than i thought it would, but i think that i also spent more on the wood for the shelving - there were less expensive options but i ended up getting something a little nicer.
i did price it all out before starting to purchase the pieces. i also just bought a few at a time to help break up the overall cost. plus i found that my local hardware store didn't have a huge stock of these things, so i don't think i would have been able to buy them all at once anyway :)
How deep were the shelves cut?
Post a Comment